How To Repair A Punctured Tubeless Motorcycle Tyre

Uncategorized
a picture of Ari who is the owner of Tyreman M/C
Author
Ari Kypuros Owner & Founder of Tyreman M/C
10 mins January 9, 2023
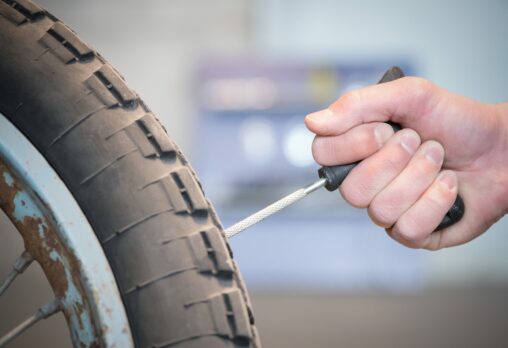
A hand holding a tyre repair kit next to a motorcycle tyre

Repairing A Punctured Tubeless Motorcycle Tyre

There’s nothing worse than being out on the open road enjoying a ride when a puncture strikes. Getting a punctured tyre is never fun, even more so on a motorcycle as they don’t carry spare tyres onboard like cars. There are all sorts of ways a tyre can be punctured, rogue nails, screws and debris can all get in the way of a day’s ride by putting a hole in your tyre.

Most of us know the basics on how to look after our motorbike, but many don’t know the all important art of repairing a tyre puncture. Thankfully tyre repair kits are affordable and easy to use once you learn how. We recommend always carrying a tyre repair kit on your bike. These things happen at the most inconvenient times and your next puncture could be right around the corner. Today we’re going to take you through the steps for repairing a puncture to a tubeless motorcycle tyre, so the next time it happens you’ll be equipped with the confidence and know how to get back out on the road and to safety.

Before you start, familiarize yourself with the basics of motorcycle maintenance.

A hand holding a tyre repair kit next to a motorcycle tyre
Above: A Tyre Repair Kit In A Workers Hand

Before You Start Your Repair

When you find yourself with a motorcycle tyre puncture, the first thing you need to do is get you and your bike to a safe spot so you can comfortably perform the repair on the bike. Your safety is the most important thing, so don’t sacrifice this to save the bike.

The method we are discussing today is for the puncture repair for tubeless motorcycle tyres. Check out our guide on how to choose the right tyres for your bike to understand more about different motorcycle tyres. This repair method will not work on other bike tyre styles and will not work on punctures larger than ¼ inch (it can potentially be dangerous to fix a puncture larger than ¼ inch on a tyre).

Before any of this can happen, however, you need to have a motorcycle tyre repair kit. There won’t be any repairs if you don’t have a repair kit, so make sure you ride with one at all times.

Here’s a list of items you should have within your tyre repair kit.

  • Rubber solution
  • Rubber plugs
  • Reaming tool
  • Pliers
  • Plug insertion tool
  • Blade or scissors
  • Electric air compressor or equivalent (some handy repair kits come with compressed Co2 bottles to re-inflate the tyre)
  • Soapy water
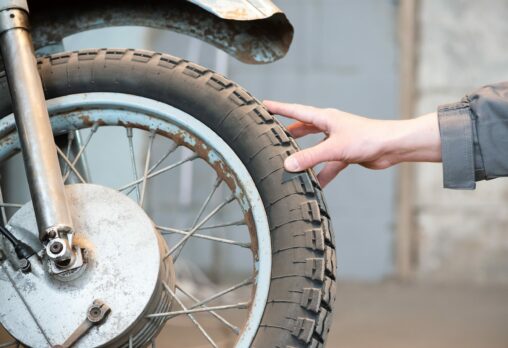
A hand touching a motorcycle tyre
Above: A Tyre Fitting Service Worker Holding A Motorcycle Tyre

Identify The Puncture

To fix the puncture, you need to work out where the hole is on the bike tyre. Do a visual search of the tyre and look for things like screws or nails that may be protruding from the tyre. These are always the most common causes of punctured tyres. If you have soapy water handy, squirt the solution around the tyre to see where bubbles form, this will be your puncture location. If you find that the puncture happens to be located on the outer sides of the tyre, it may be too hard or dangerous to repair the tyre, and you’ll likely need to get your bike towed. Learn more about when to change your motorcycle tyres.

If you’ve located the puncture and the screw is helping keep the tyre plugged, leave it in there until you have organised your repair tools. This way you can keep as much air pressure in the tyre as possible and have less inflating to do later on when the tyre is repaired. If you have a marker or bit of chalk handy, it can be helpful to mark the area where the puncture is before you take the screw out. This will help you keep the puncture located on the bike as once the screw or nail is gone they can be tricky to find amongst all the dark tyre tread.

a tyre repair plug being shown in front of a motorcycle tyre
Above: A Tyre Repair Plug In A Workers Hand Next To A Motorcycle Tyre

Get The Plug Ready

Essentially what a motorcycle tyre repair kit does is plug the puncture with a rubber plug, so that you can inflate the bike for long enough to get it to a shop that can replace the tyre. Once you have located your puncture, you need to prepare the rubber plug.

For this step you will need the plug insertion tool, the rubber solution and the rubber plug itself. Thread the plug through the insertion tool so that it’s sitting evenly at the middle of the plug. This is just like threading a needle. It may be a little tight, so to help you can pinch the end of the plug to squeeze it through the needle head. At this stage you can lather your plug up with the rubber solution, being sure to save some for the hole itself once the plug is inserted.

The next few steps will happen fast, so be sure to be across them before you start the repair process.

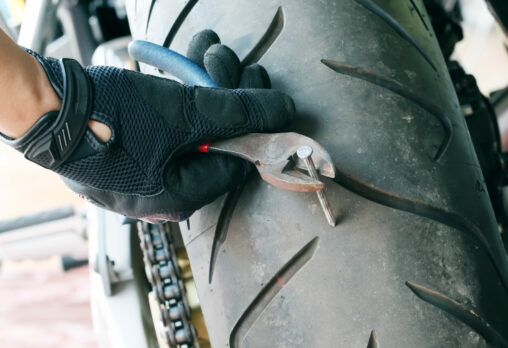
A nail being removed from a motorcycle tyre with pliers
Above: A Nail Being Removed From A Motorcycle Tyre

Prepare The Hole

Once you have prepared the rubber plug it’s time to prepare the puncture hole and plug the tyre itself. It is a good idea to familiarise yourself with these next few steps as the quicker you can work through the process the less air pressure you will lose from the tyre and the less work you will have to do re-inflating the tyre.

If it hasn’t already been removed, now is the time to remove the offending item. Use the pliers to help remove the object, it should pop out once loose. Act quickly to save losing too much tyre pressure!

Once the puncture is loose, insert the reaming tool into the puncture and file around the edges to open the hole up. Do this a few times until the hole is big enough to snugly fit the plug insertion tool.

Be sure to check that the hole you have made is no bigger than ¼ inch wide in diameter. It is not safe to ride with a repair to a hole more than ¼ inch big, so do not try and repair this.

A motorcycle tyre being plugged with a tyre repair kit

Plugging The Tyre

Once you’ve created a large enough hole, slowly insert the prepared plug into the puncture, aiming to get it two thirds of the way in. It may feel quite tight, which is normal, so it’s ok to use a bit of force when inserting the plug in.

Once the plug is in, pull the insertion tool out from the tyre. This stage can also require a bit of force, so don’t be afraid to use some muscle. The insertion tool should eventually pull out whilst at the same time detaching itself from the rubber plug, leaving it in place and filling the puncture hole area.

Use a sharp blade or scissors in your repair kit to cut off any excess plug protruding from the tyre. Be sure to cut this back flush with the tyre surface as any excess left protruding could catch while riding and end up with the plug ripping out (which can be quite dangerous while riding). Once this is done you can add the rest of the rubber solution to the puncture area for a nice even seal.

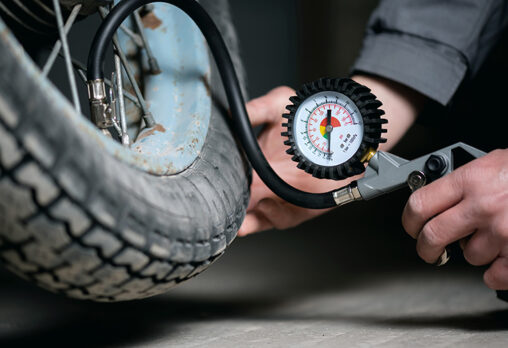
a close up photo of a person monitoring the air pressure of a motorcycle tyre

Inflating The Tyre

It’s time now to re-inflate your tyre and see if the repair has fixed the puncture. You should have an appropriate method for inflating the tyre. It may be a hand pump, electric pump, compressed Co2 cartridges, or a long slow walk pushing your bike to the nearest gas station. Whichever it is, re-inflate your tyre to a usable air pressure. As we’ve discussed in our tyre pressure guide, a general setting of 32 psi is recommended for front and rear tyres, however you can get away with around 28 psi to get yourself out of trouble.

Remember that a repair like this is a quick-fix solution to help you get your bike to a place where it can be repaired professionally. We don’t recommend riding the bike if it isn’t inflated to at least 28 psi as it can be detrimental to your bike and safety.

Once the tyre is pumped to a safe pressure, do a few checks to see that the puncture repair has worked. Use a soapy water solution to cover the puncture area and watch to see if any bubbles form, at the same time listen for any hissing noises or sounds that may indicate air still coming from the tyre. If it doesn’t seem to be leaking anymore, you’re good to go!

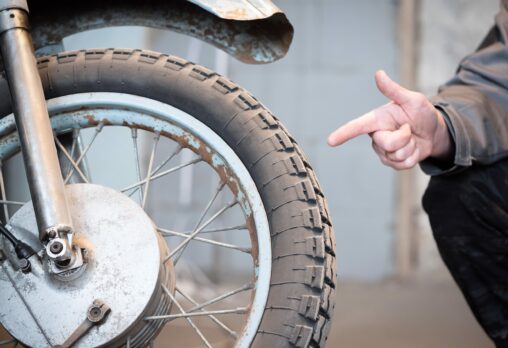
A hand pointing at a motorcycle tyre
Above: A Worker Pointing At A Motorcycle Tyre

Now that You Know How To Repair An Emergency Tyre Puncture, You Can Ride With Confidence!

Knowing how to repair a tyre puncture is an important skill to have as a motorcycle rider. Remember that repairing a punctured tyre with a puncture kit is helpful in an emergency but will never be as good as replacing the tyre properly.

We recommend replacing your tyre as soon as it’s safe to do so, and we’re the best in the business for all things tyre related, including installation, replacement and balancing of tyres. If you’ve had a recent tyre puncture, be sure to get in touch and organise a tyre replacement with us as soon as possible. The sooner your bike is back in shape, the sooner you can get back out on the road and enjoy the good things in life!